Setting up Email
—
by
Please enter your email address and domain details to receive your settings:
please dont use www.
Your email settings
| Email Address | |
| Username | |
| Account Type/Server Type | IMAP |
| Incoming Mail Server | mail. |
| Incoming Mail Server Port Number | 143 |
| Incoming Mail Server Encryption | none |
| Outgoing Mail Server | mail. |
| Incoming Mail Server Port | 2525 |
| Outgoing Mail Server Encryption | none |
| Outgoing Mail requires Authenticaltion | Yes |
| Outgoing Mail username | |
| Outgoing Mail password | {{yourpassword}} |
Please select your software to see instructions on how to setup your brokr email
iPhone instructions
- First, locate and press the “Settings” icon. Usually it is on the home screen but it may be on a different screen than the home screen.
- Scroll to and select Passwords & Accounts. Note: In older versions of iphone it will be under “Mail” or under “Mail,Contacts, Calendars”
- Select Accounts and Select “Add Account”.
- Then choose “Other”.
- Press “Add Mail Account”.
- Enter the following details
- the Name (your name)
- Email address () and
- Email password (sent to your email)
- A “Description” will automatically appear, but you can change it if you like.
- Press “Next”.
- In this tutorial we are creating an IMAP account… therefore, ensure the IMAP option is selected here (it is by default).
- Next, enter your Incoming Mail Server settings.
- Host Name (mail.)
- User Name () and
- Password.
- Next, enter the following details for Outgoing Mail server (even though it says optional, you will need to fill in all the details)
- Host Name(mail.)
- User Name() and
- Password
- When finished, press “Next”.
- It will about a minute for iPhone to verify your details, once done it will take you to the next screen.
- Then press “Save”.
- Success! The IMAP email account has been setup on the iPhone, and you can see it here listed under “Accounts”.
- Let’s return to the home screen by pressing the Home button on the iPhone.
- To check your email, press the “Mail” icon here (Note: the icon may be in a different location on your iPhone).
- If you have multiple email accounts setup in your iPhone, they’ll all be listed here. Select the email account we just setup … and any emails in your inbox will be displayed here. Click an email header to see the email.
Outlook Instructions
Open Outlook
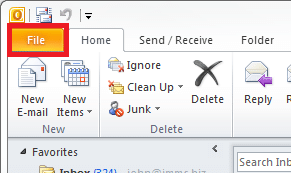
Click File
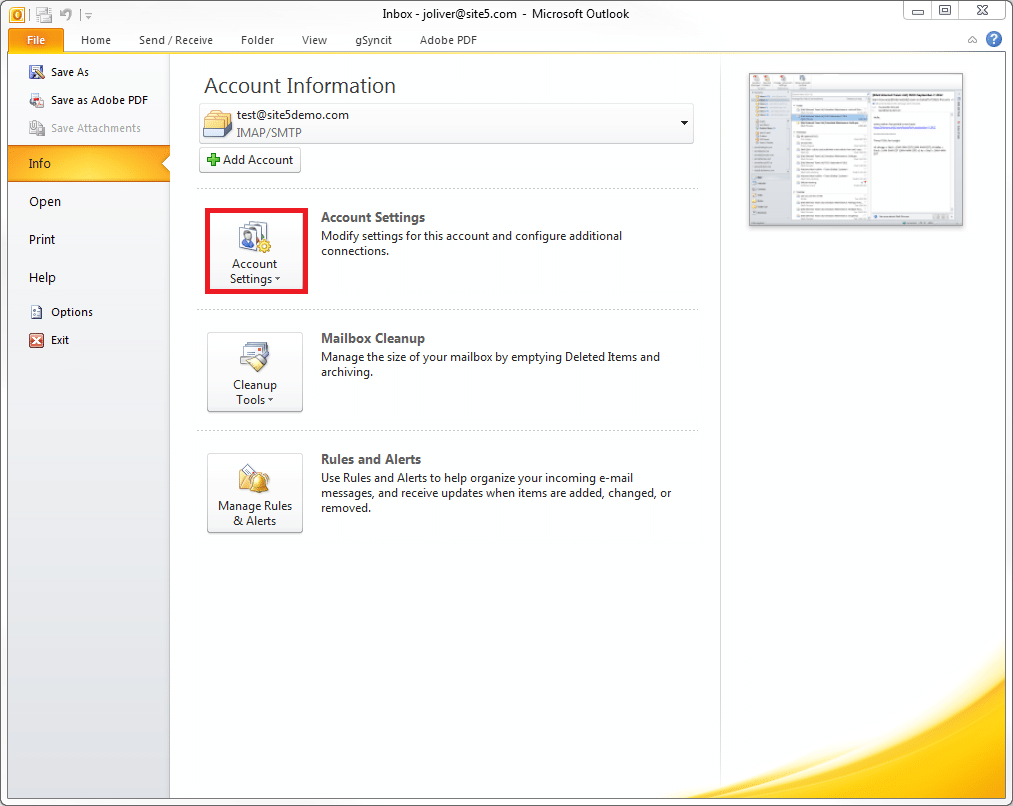
Click the Account Settings button
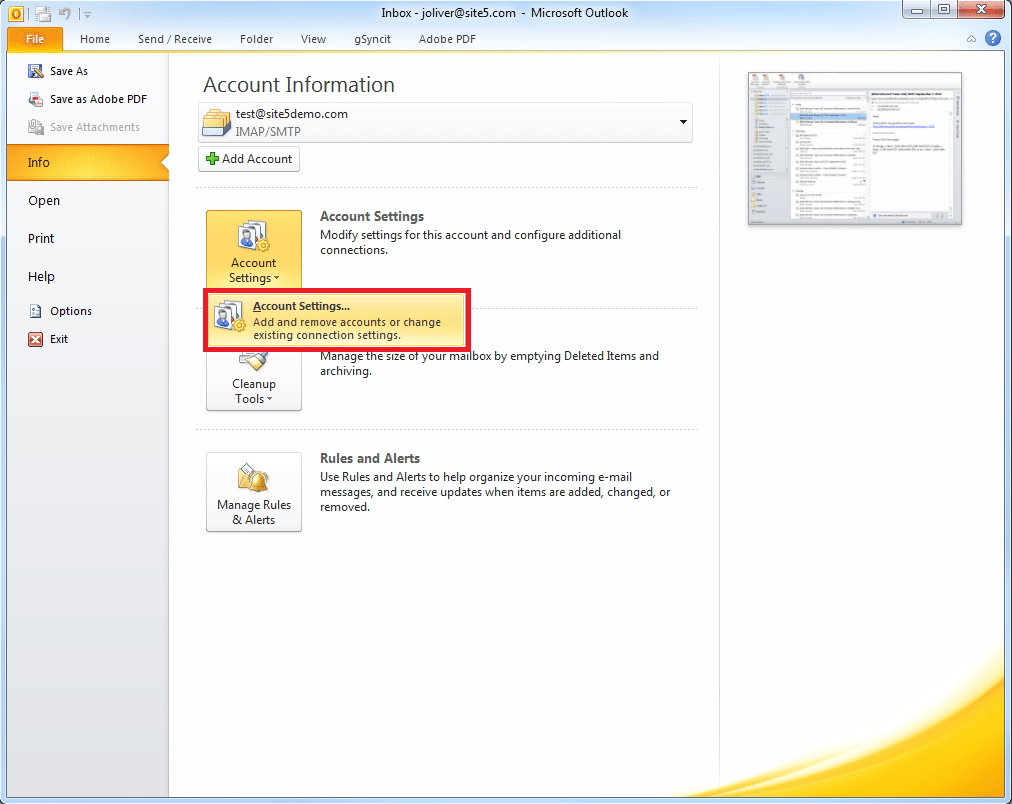
Select the Account Settings button from the drop-down
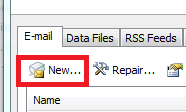
Click New
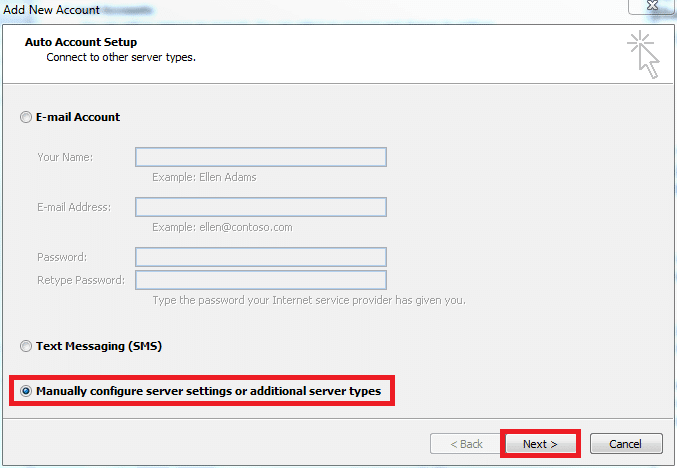
Click Manually configure server settings or additional server types, then click next
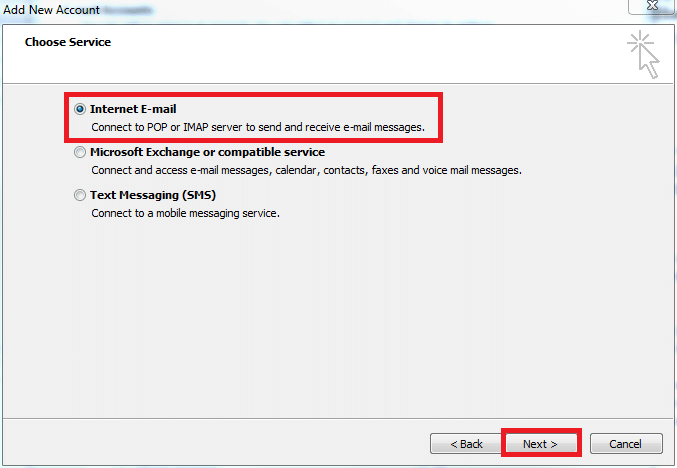
Click Internet E-mail, then click Next
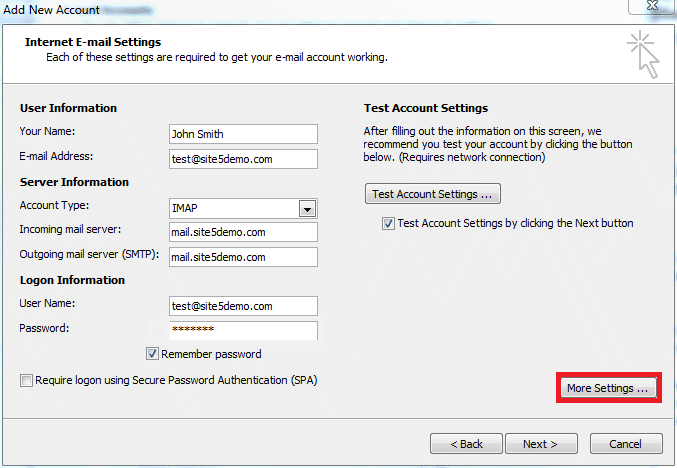
Enter your name
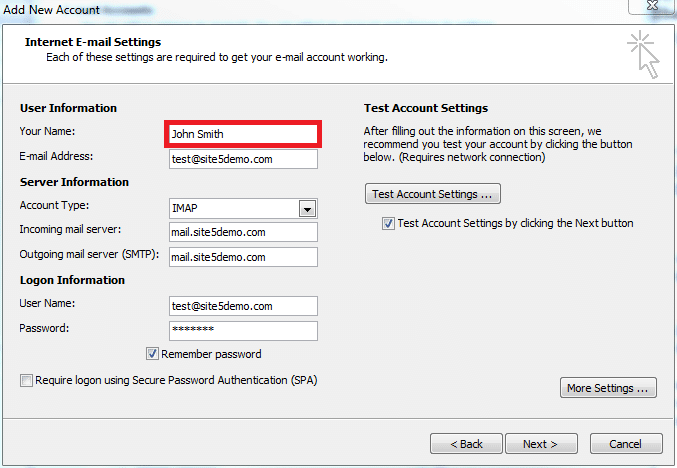
Enter your email address
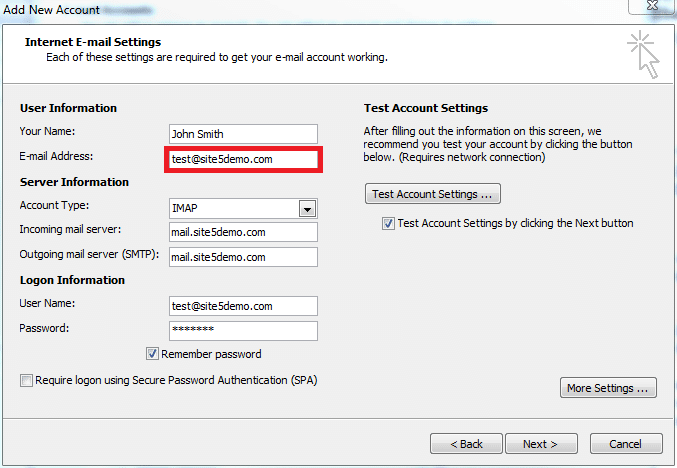
Select the account type you wish to use. We will be using IMAP for this demo.
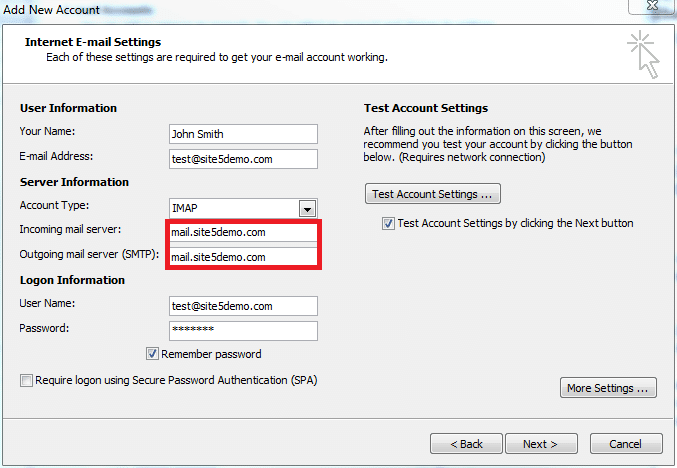
Enter the incoming and outgoing mail servers. use mail. for incoming mail server and mail. for outgoing mail server (SMTP)
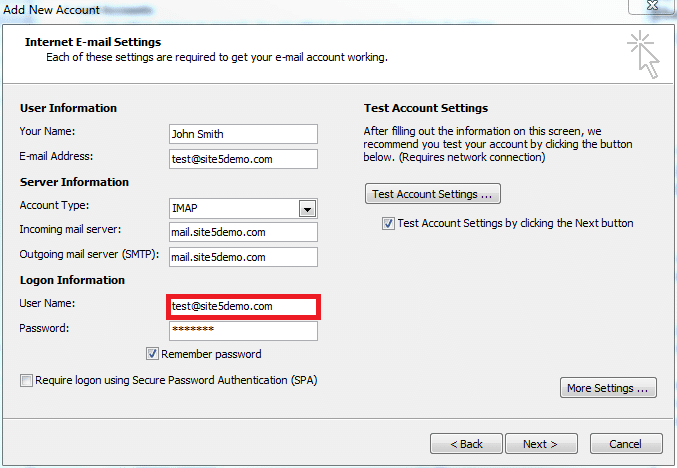
Enter your email address into the User Name field
Enter your password
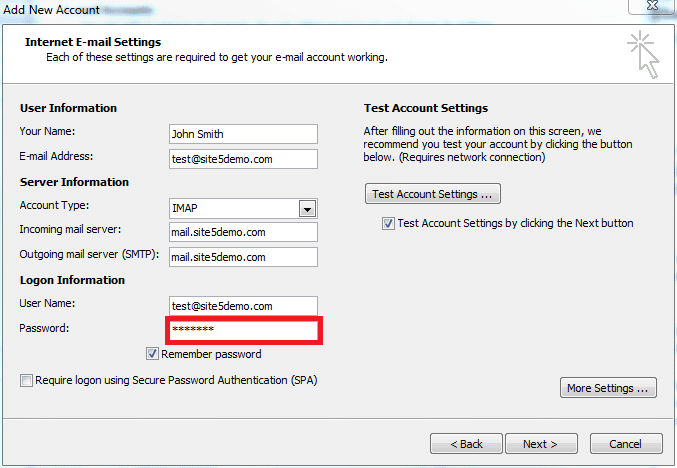
Click More Settings
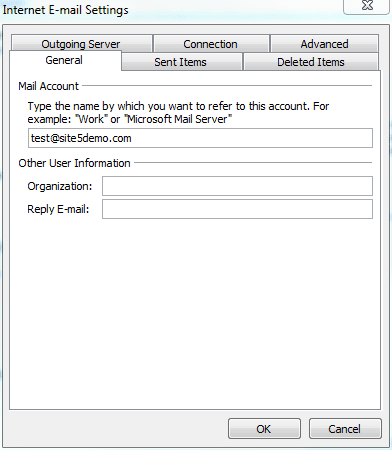
Click the Outgoing Server tab
Check My outgoing server (SMTP) requires authentication
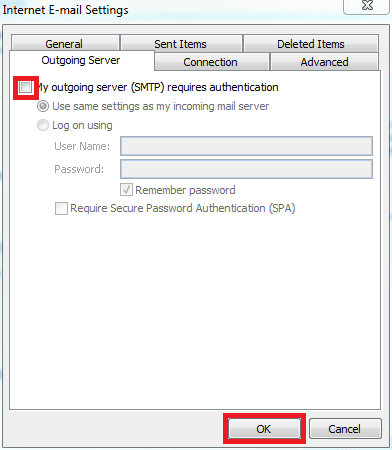
Press OK
Click Finish
Click Finish
Android instructions
- Open up Gmail
- Open menu on left hand side, scroll down and click settings
- Select “Add Account”
- Select “Other”
- Enter your email address and select Manual Setup
- Select Personal (IMAP) as type of account
- Enter your password and click next
- You will be taken to incoming server settings, leave username and password as is and put mail. under server and click next
- Gmail will validate this and take you to next screen when done
- You will be taken to Outgoing server settings, leave username and password as is and put mail. under server and click next
- Gmail will validate this and take you to next screen when done
- In next screen (Account options), leave everything as is and click next
- Your account should be setup now
